Purpose:
Purpose of this plugin is to provide power to admin to add Customer Group feature to manage customer related funtionality based on Customer group.
Installation:
Installation using wordpress admin (Easiest Way)
To do an quick installation of 'Customer Groups for Woocommerce', log in to your WordPress dashboard, navigate to the Plugins menu and click Add New. In the search field type 'Customer Groups for Woocommerce'. Once you have found it you can install it by simply clicking "Install Now" and then "Activate".
MANUAL INSTALLATION
Installing through WordPress Dashboard
* Download customer-groups-for-woocommerce.zip* Navigate to the 'Add New' in the plugins dashboard
* Navigate to the 'Upload' area
* Select customer-groups-for-woocommerce.zip from your computer
* Click 'Install Now'
* Activate the plugin in the Plugin dashboard
Using FTP
* Download customer-groups-for-woocommerce.zip* Extract the customer-groups-for-woocommerce.zip to your computer
* Upload the customer-groups-for-woocommerce directory to the /wp-content/plugins/ directory
* Activate the plugin in the Plugin dashboard
Getting Started:
After installing plugin, You will see a "Wumento Customer Groups" link in the admin sidebar under the Woocommerce > Products. Clicking on it will take you Customer Groups Page, where You can add/edit/delete existing Customer groups.
How to Enable/disable the plugin ?:
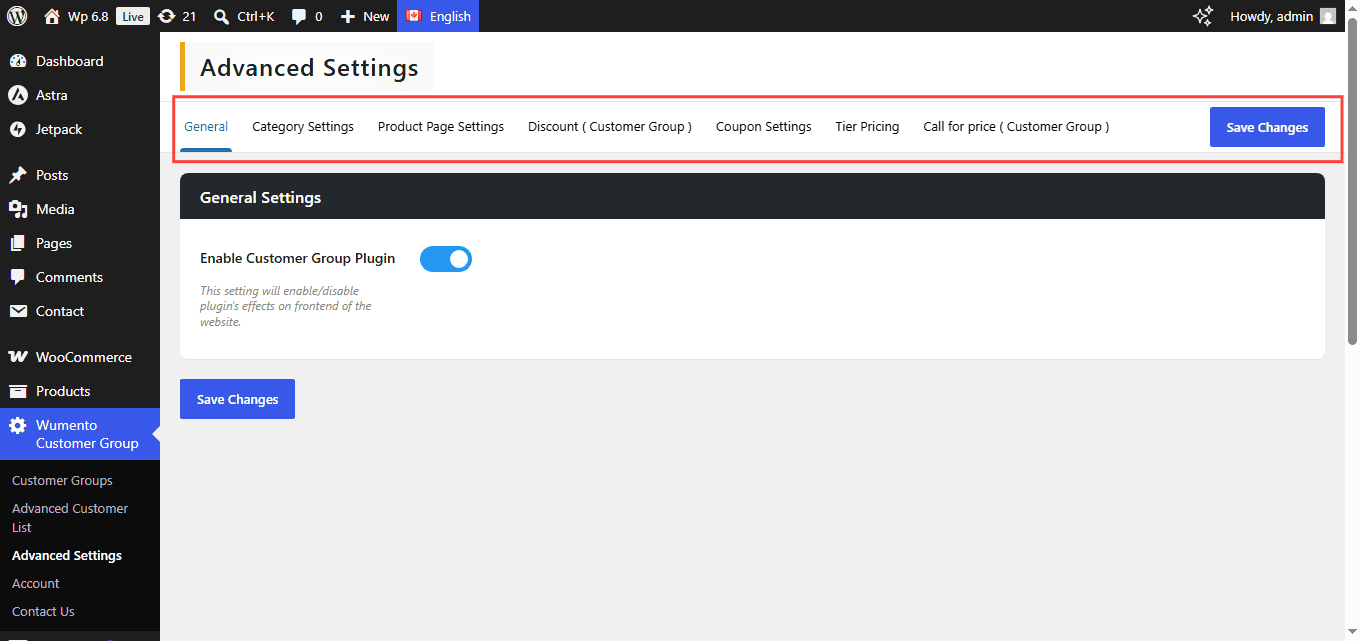
Go to wordpress admin and go to Wumento Customer Groups > Advanced Settings > General Tab. You will see a toggle button to enable/disable this plugin. Use it to enable/disable the plugin.
Add a new customer group:
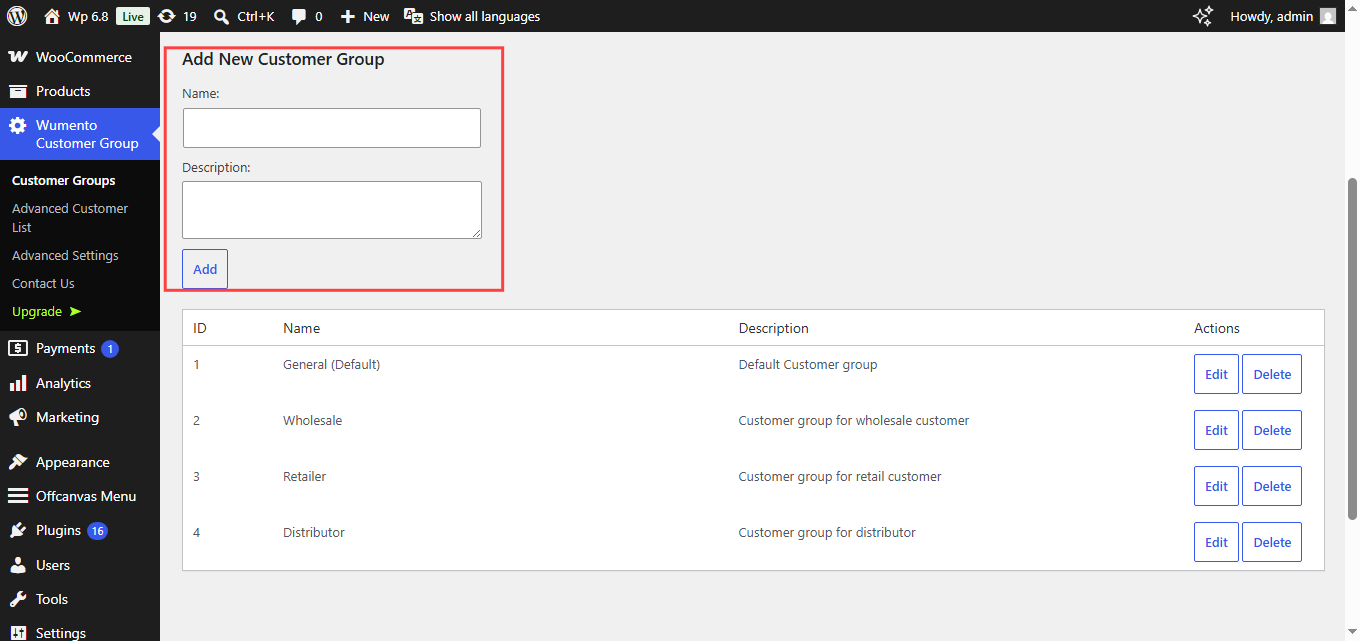
To add a new customer group please go to Wordpress Admin and then go to Wumento Customer Groups > Customer Groups.
This will give you a window where you will see a button Add New Customer Group. When you will click on it. you see a new form opened where you can fill Name and Description of the group and then press Add button and it will add a new group add.
Click on "Add" button.
Edit or delete existing customer group:
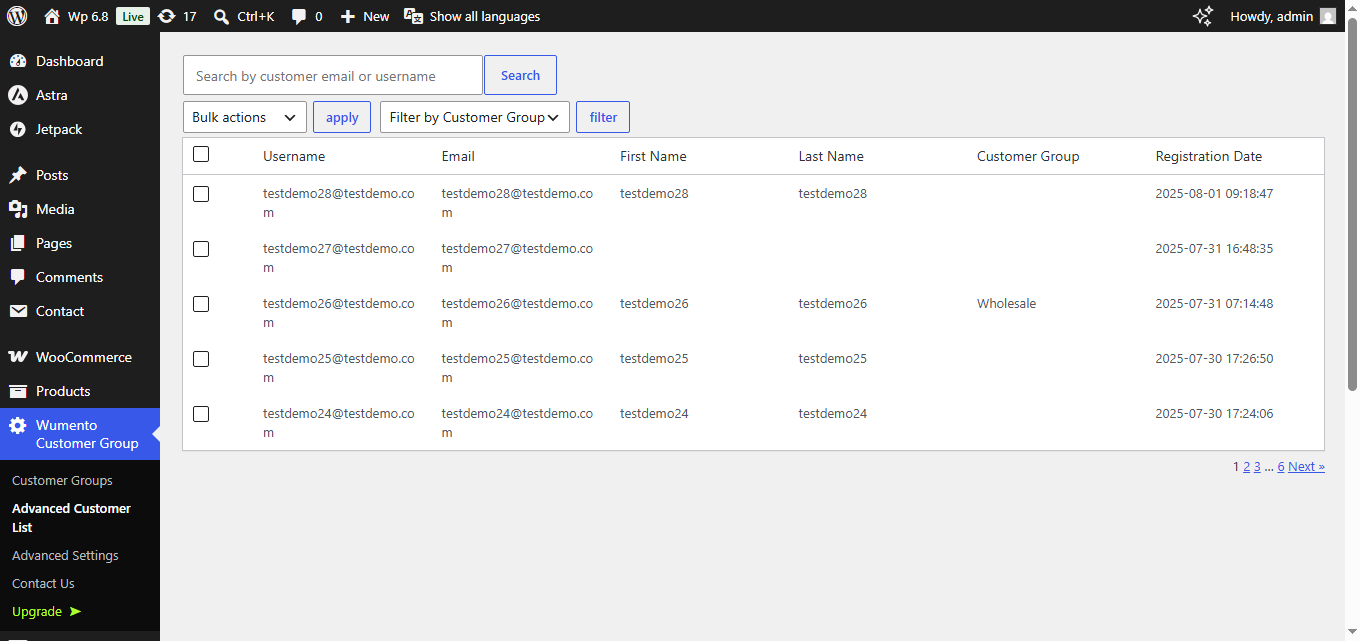
To edit or Delete existing customer groups, go to Wordpress Admin and then go to Wumento Customer Groups > Advanced Customer list, you will see a list of existing customer groups. You can edit or delete these existing customer group.
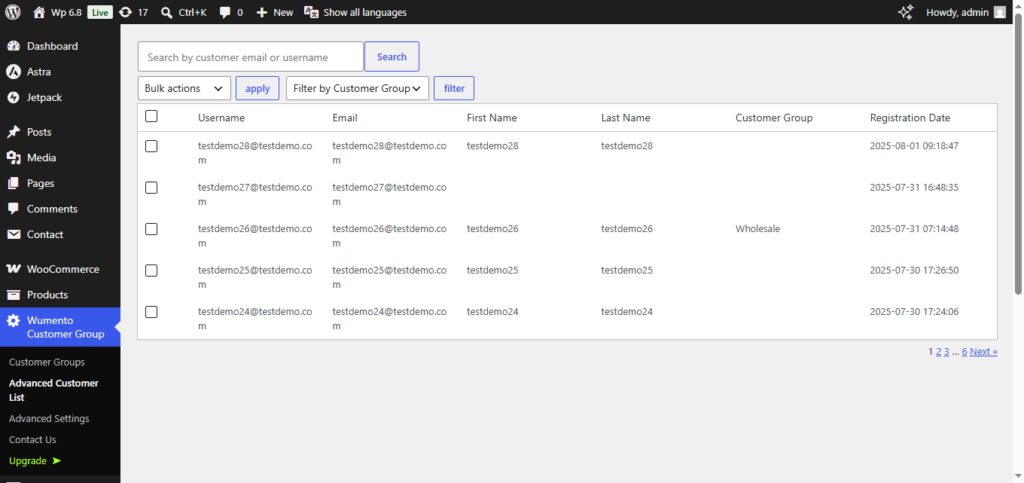
Change or assign a customer group to any customer
For this go to Wordpress Admin and then go to Wumento Customer Groups > Customer Groups > Customer Groups.
This will give you all existing customer list. You can select customer and then on the top you can select the Change Group and then apply the customer group.
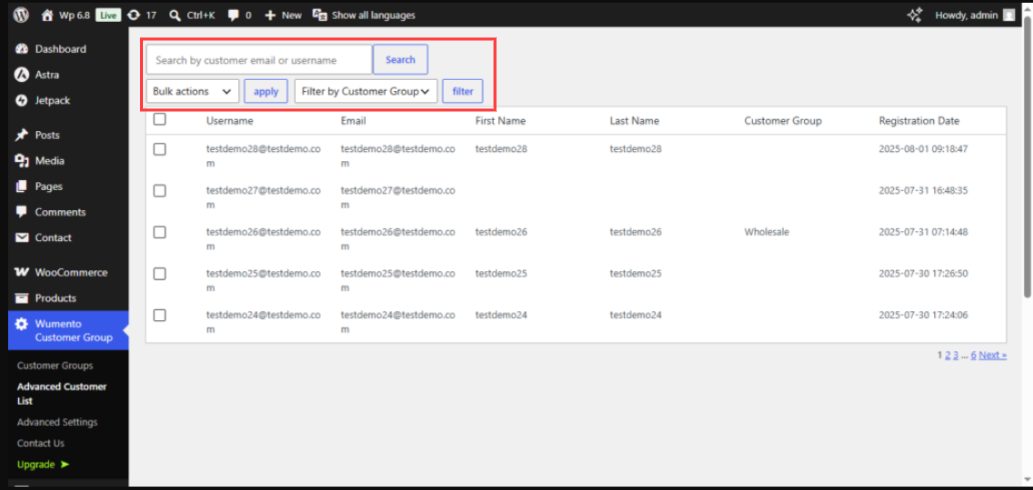
This assign or change the customer group to the particular customer. You can also search Particular customer here and also you can filter here Customer by the particular customer group.
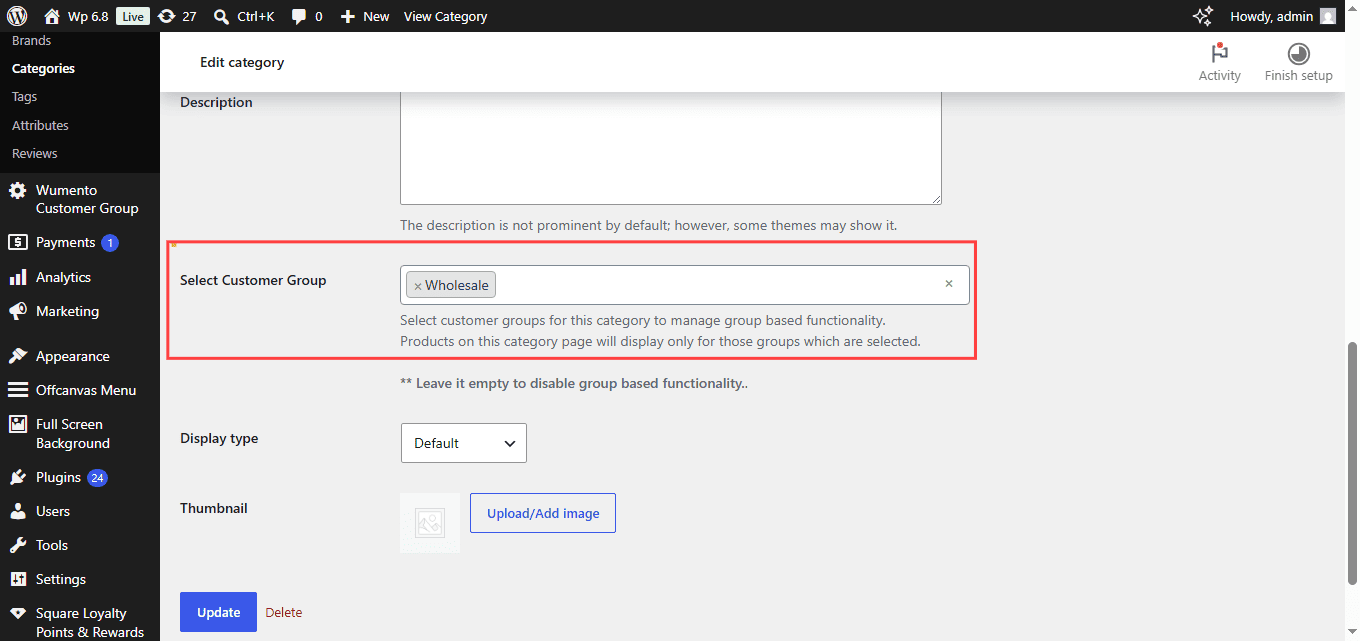
Hide product on category page :
For this go to Wordpress Admin and then go to Woocommerce > Products > Categories and edit the category you want to hide products for. There will be a section on the page where you can select customer groups. Select the one or more customer group as per your requirement for which you want to hide the product and save the category. Check Screnshot below.
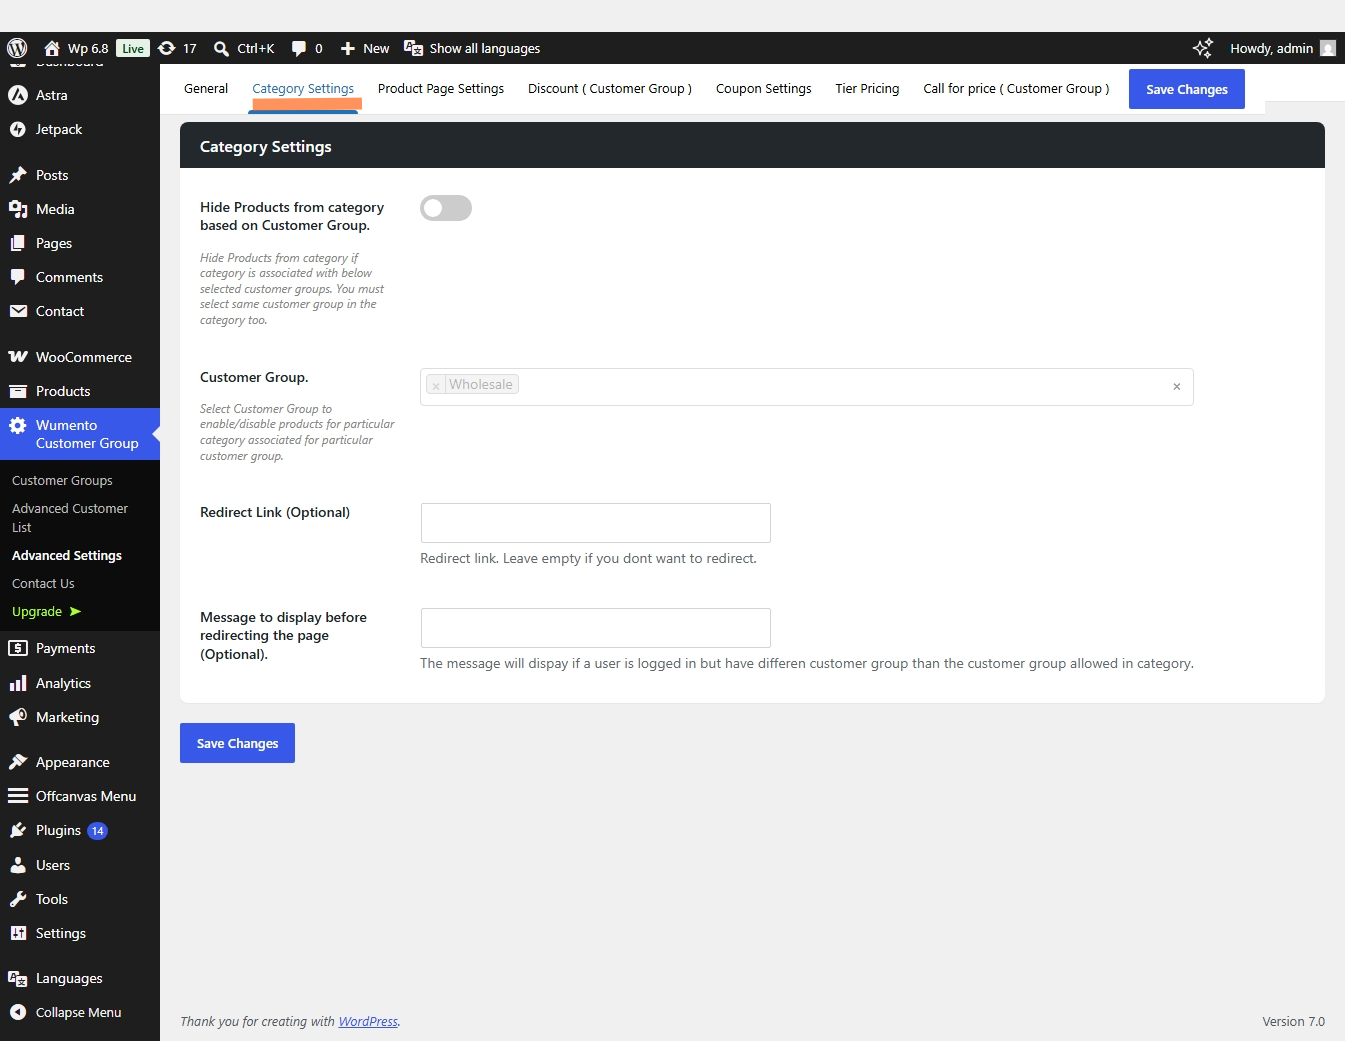
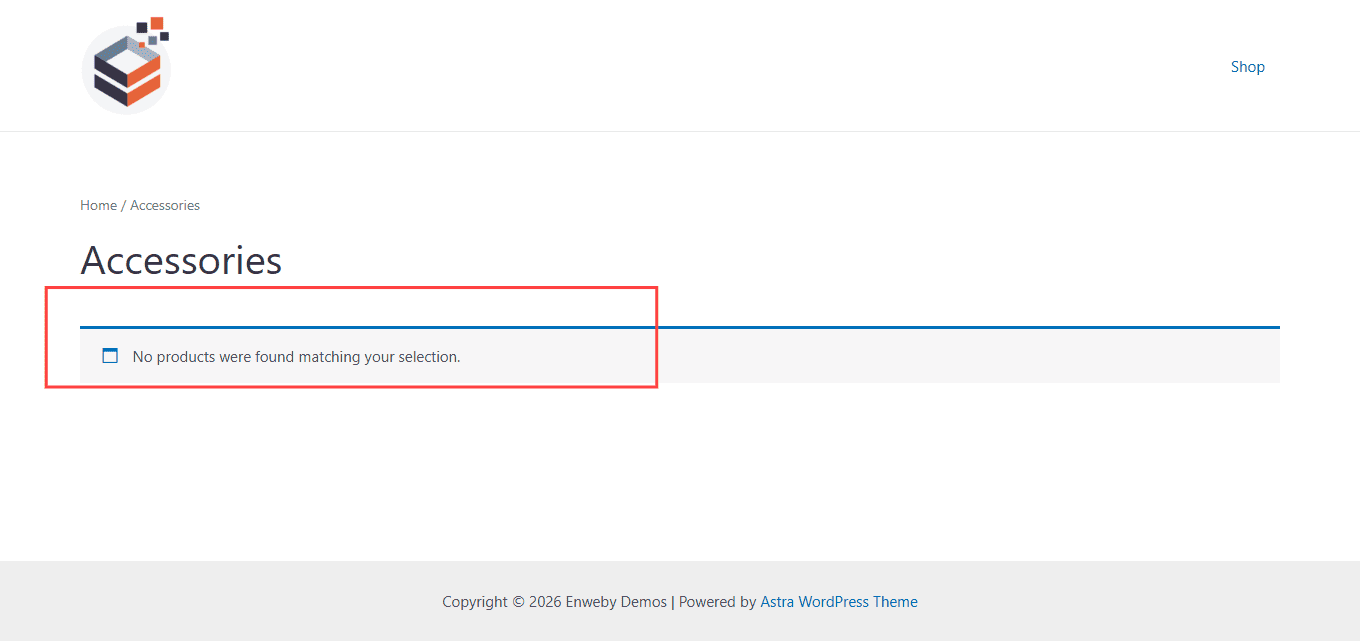
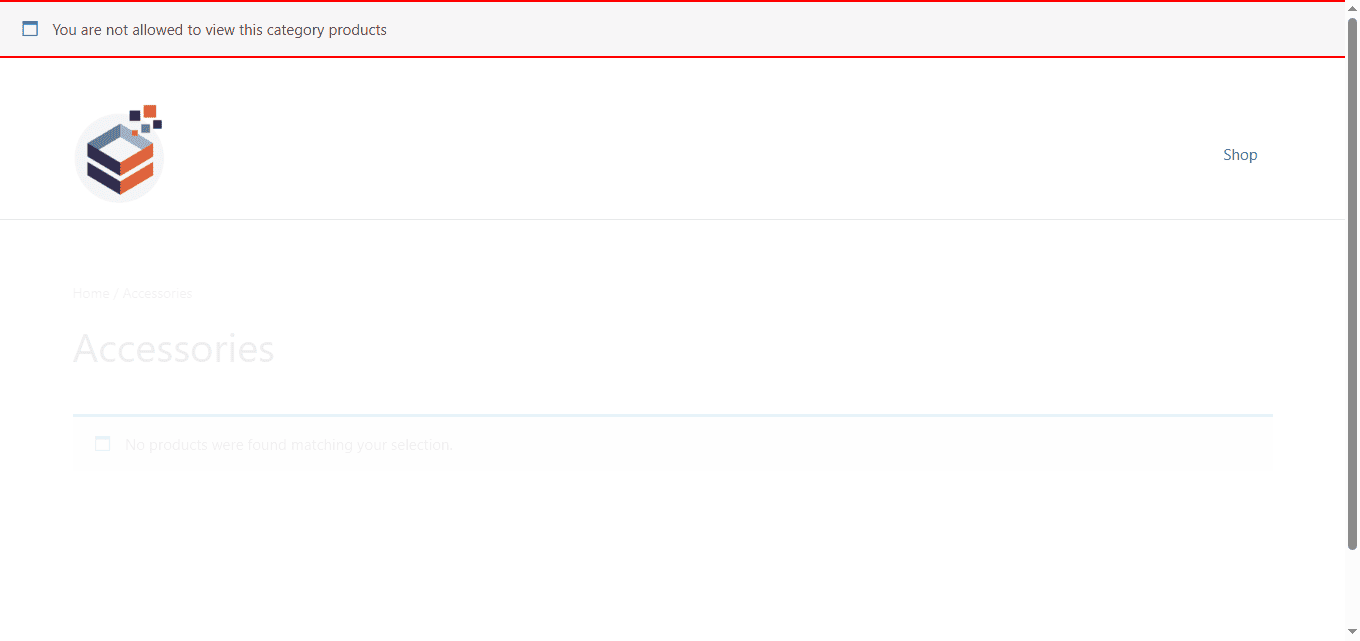
Now go to Wumento Customer Groups > Advanced Settings > Category Settings tab. This will display you a category setting page. You need to enable the category settings then you need to select customer group or groups if you want multi groups. You can also set redirect page link which is optional. You can also add a message to display and save it. On the front end for this particular category, user will not see any product, instead he will see message that he will need to login to view the products. If someone logged in on the frontend and his account has customer account group which you have just used in the admin settings, can view the products else he will display the default message or the the you have set in the Category settings tab.
Hide Individual products on the front end :
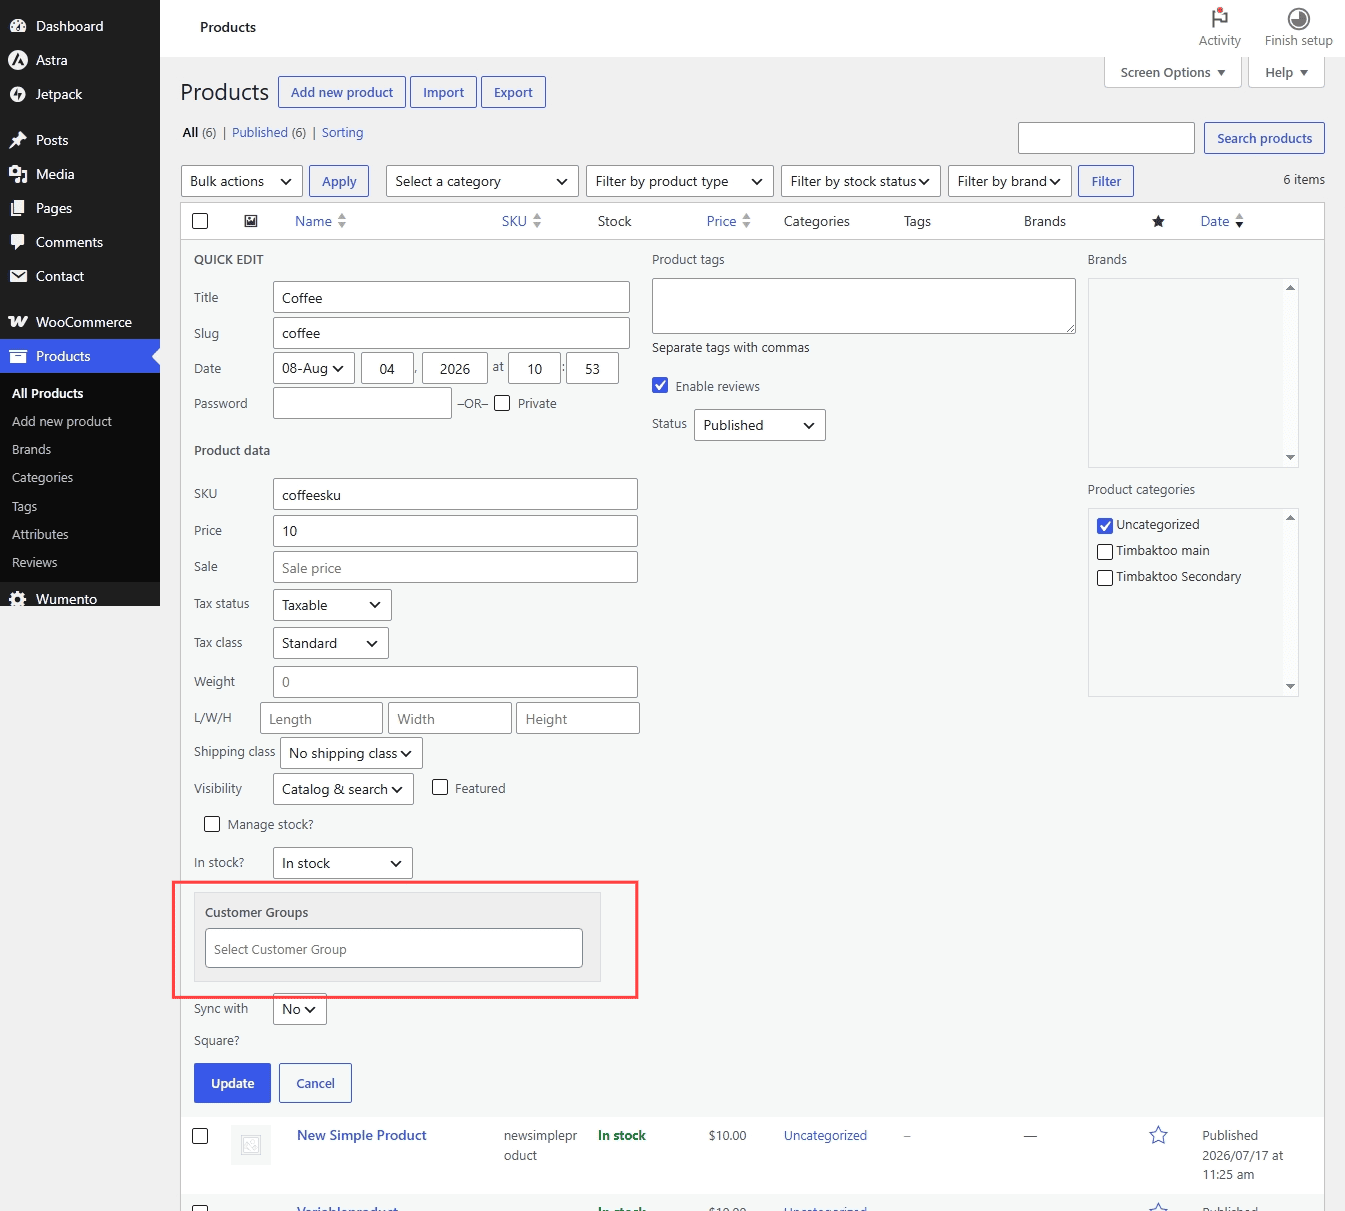
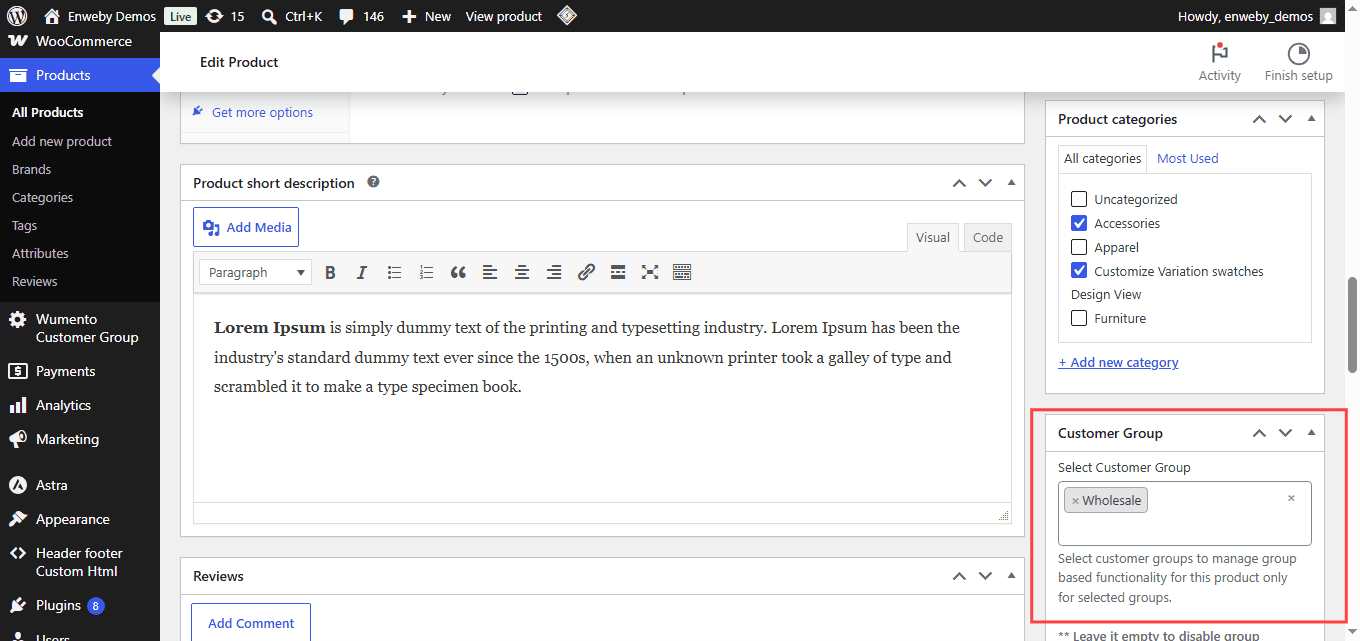
For this go to Wordpress Admin and then go to Woocommerce > Products and edit or quick edit any product, which you want to hide. You will see a section where you will be able to select Customer Group. You can select one or multiple customer groups. Please note Customer group section is available in both quick edit and normal edit of products page.
Now you will need to do one more settings so go to Wumento Customer Groups > Advanced Settings > Product Page Settings tab you need to enable the Hide Product Page content. Check screenshot below.
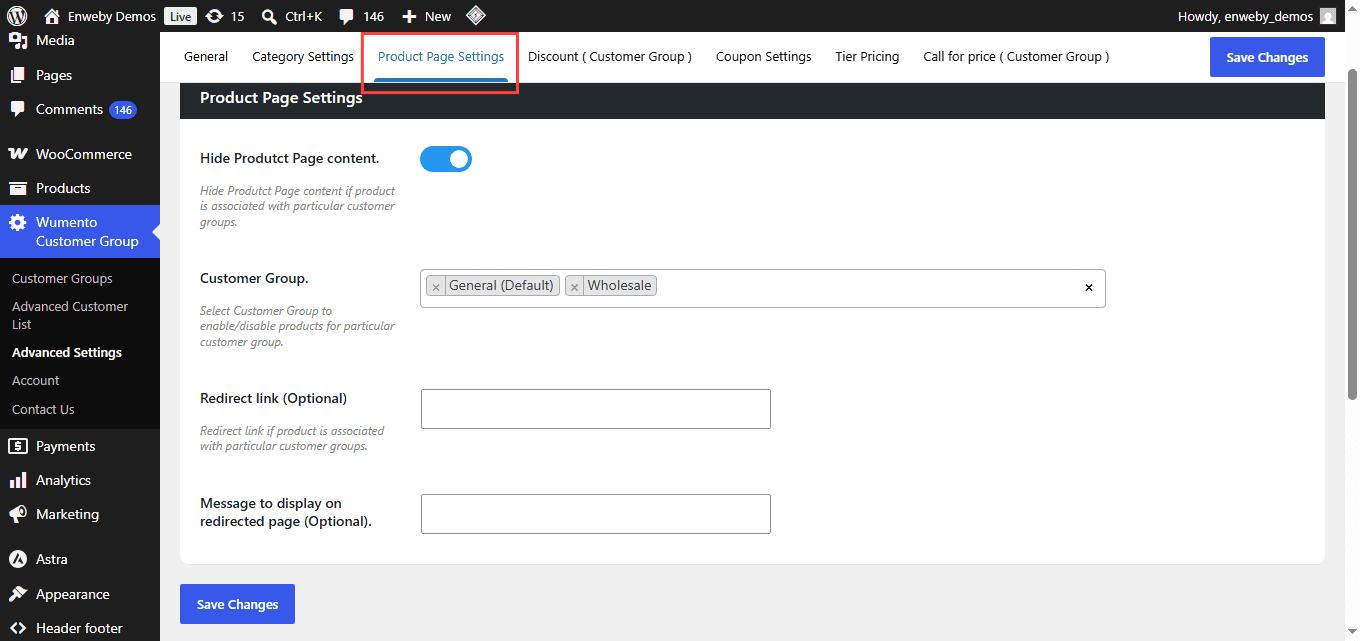
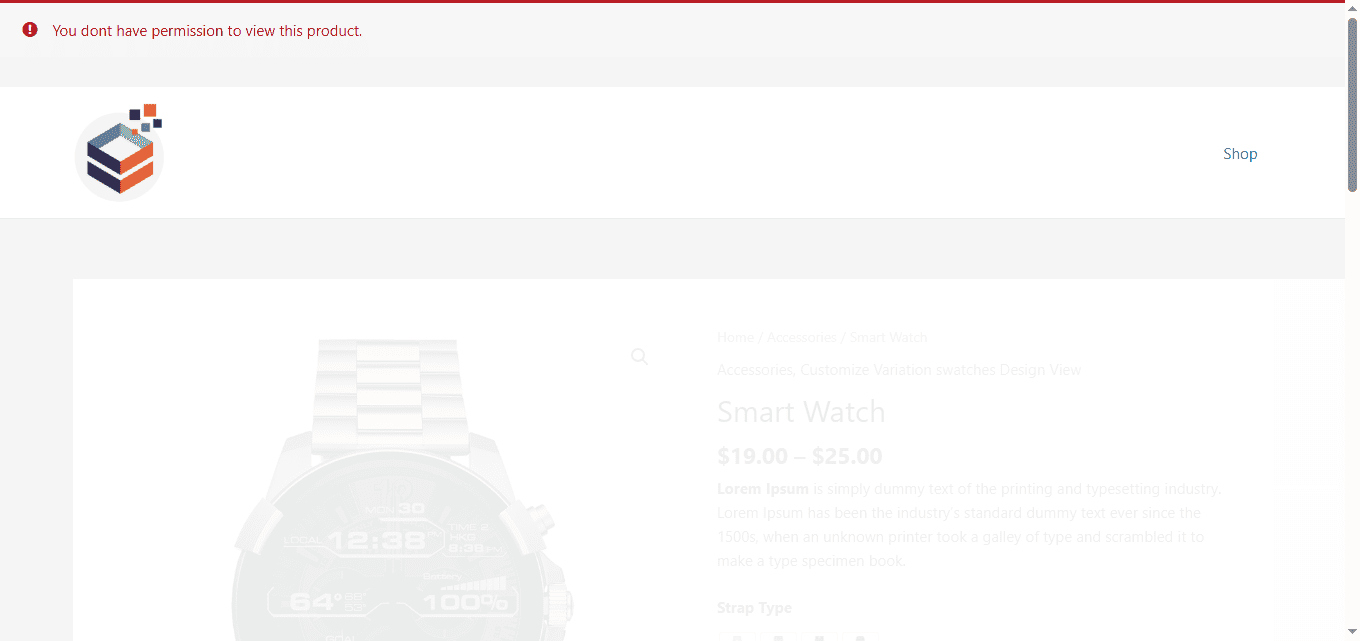
Now select the same customer group or groups which you selected in Products. This will hide the product content for the products on product details page. You can also add Redirect link or message to display on redirection. Both of these are optionals. Save the settings. Now if someone goes to the front end and goes to the particular product's product detail page he will not be able to see the content of the page, instead he will see a blurred layer on the content so that content will not be visible.
Adding Group Based discounts :
To add group based discount you need to go to Wumento Customer Groups > Advanced Settings > Discount ( Group based ) tab. Check below screenshot.
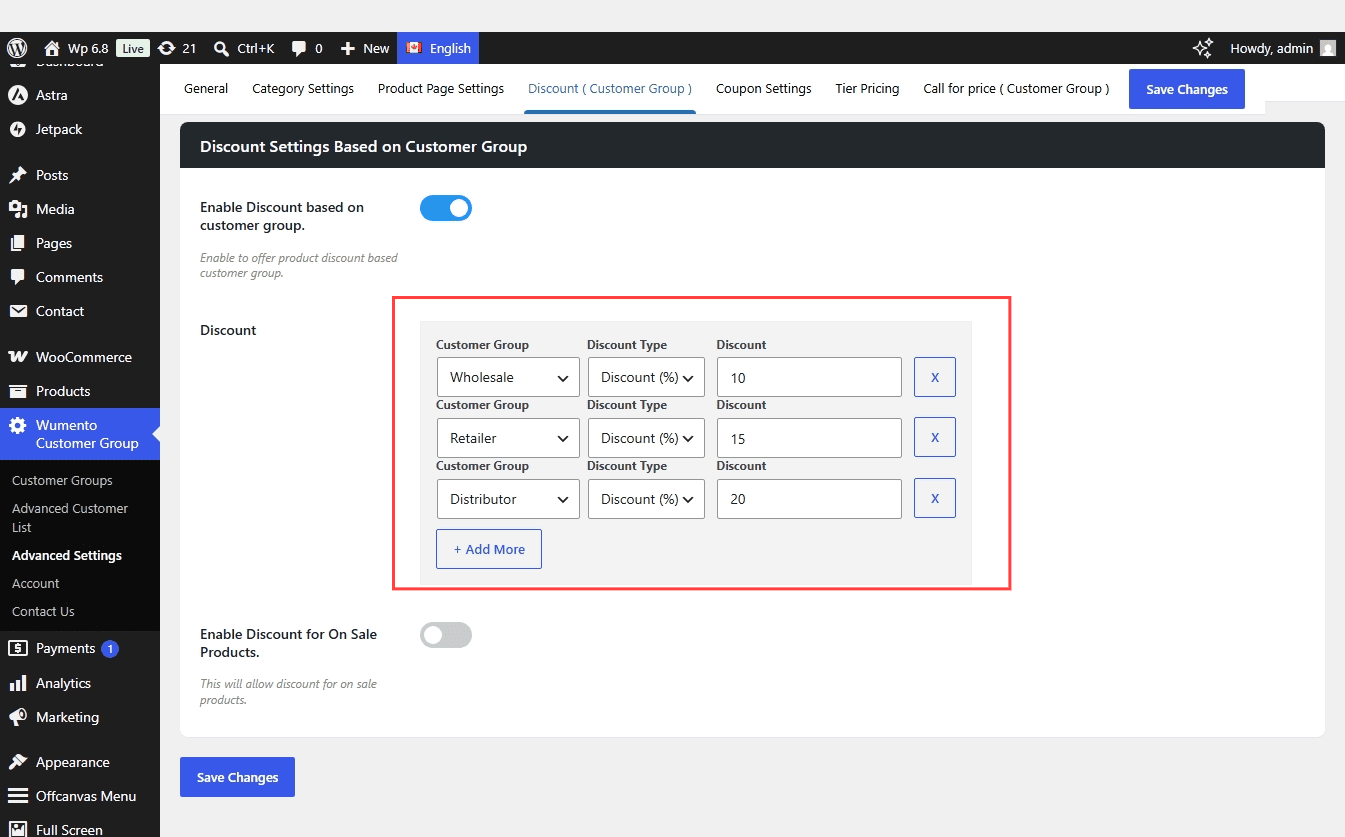
You will need to enable Enable Discount based on customer group toggle button. After that there is a discount section where you can select customer group, type of discount and amount/percent discount. If you are using pro version, you will ave option to add multiple discount.
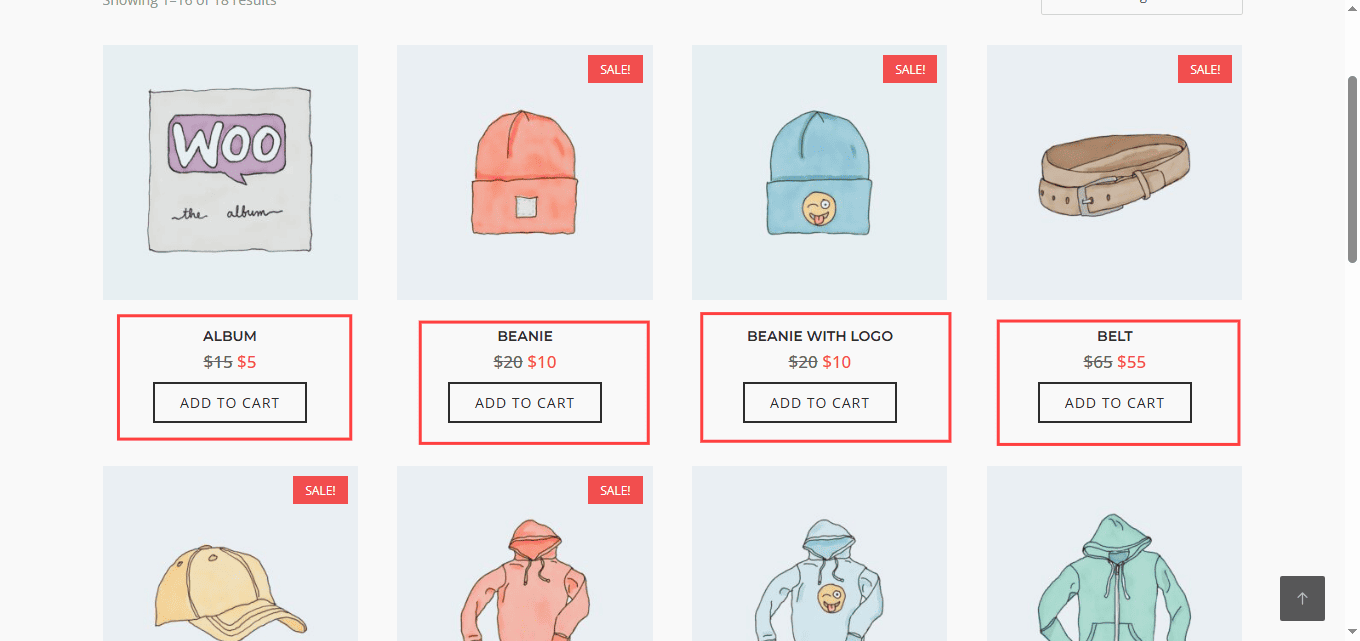
There is one more option to allow discount on the product on sale, you can enable or let it disabled based on your preference and save the settings. Now any one who is logged in and is associated with the same customer group, which you selected in the admin for Group based discount, will see the discount on category pages, list pages, and also on product pages too.
Disable coupon for particular customer group : (Premium only)
By default coupon is available for all customers in Woocommerce. Using this plugin you can disable any coupon for any particular group. To do this you need to go to WooCommerce > marketing > coupons and edit the coupon.
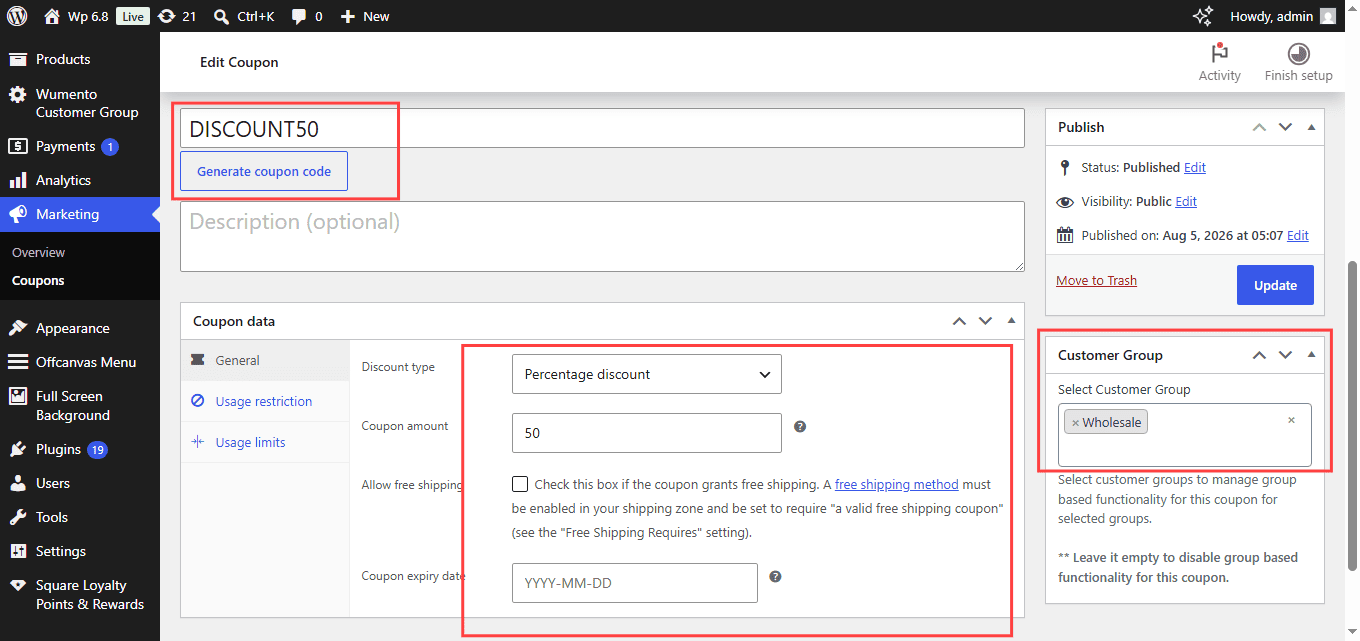
You will see there is a section where you can select customer group and save the coupon. Now go to Wumento Customer Groups > Advanced Settings > Coupon Settings tab and select particular customer group for which you want to disable coupon.
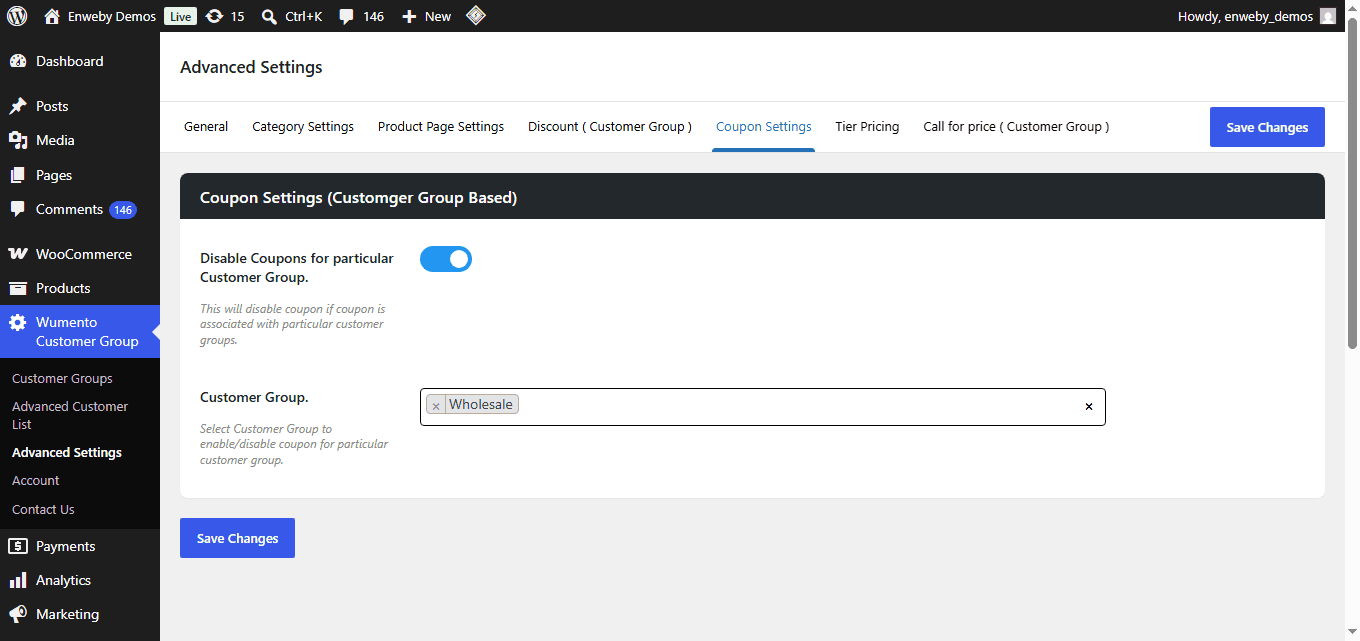
You can add one or more groups as per your requirement. The coupon will be disabled for the particular group if the user is logged in as a customer and also associated with the same Customer Group that you have selected in the admin settings to disable the coupon.
Tier pricing : (Premium only)
To add a Tier price first we need to enable the Tier pricing. For this go to Wumento Customer Groups > Advanced Settings > Tier Price tab and enble save the changes. Check screenshot below.
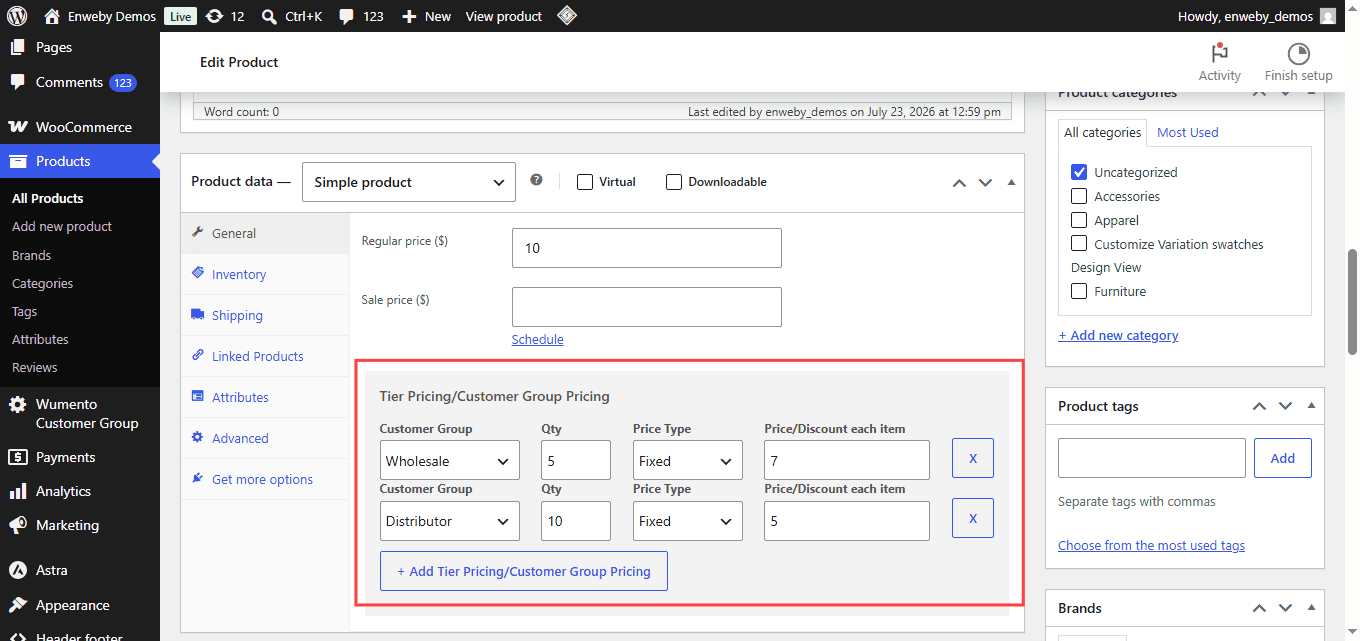
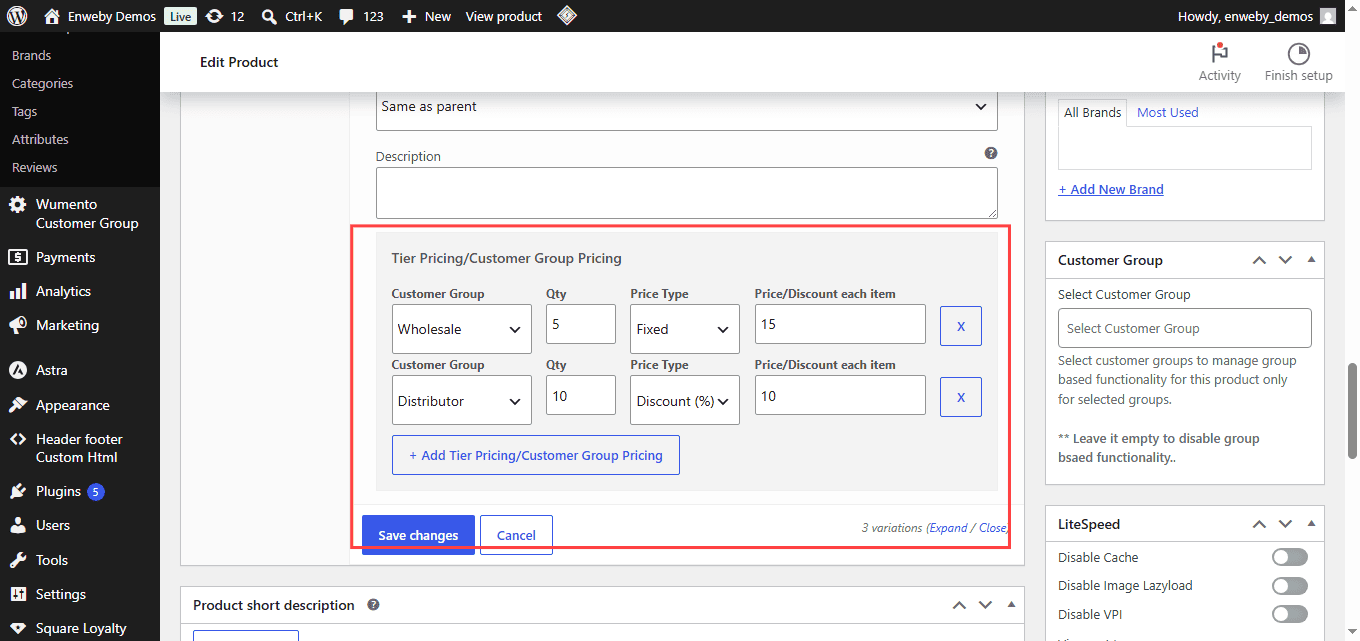
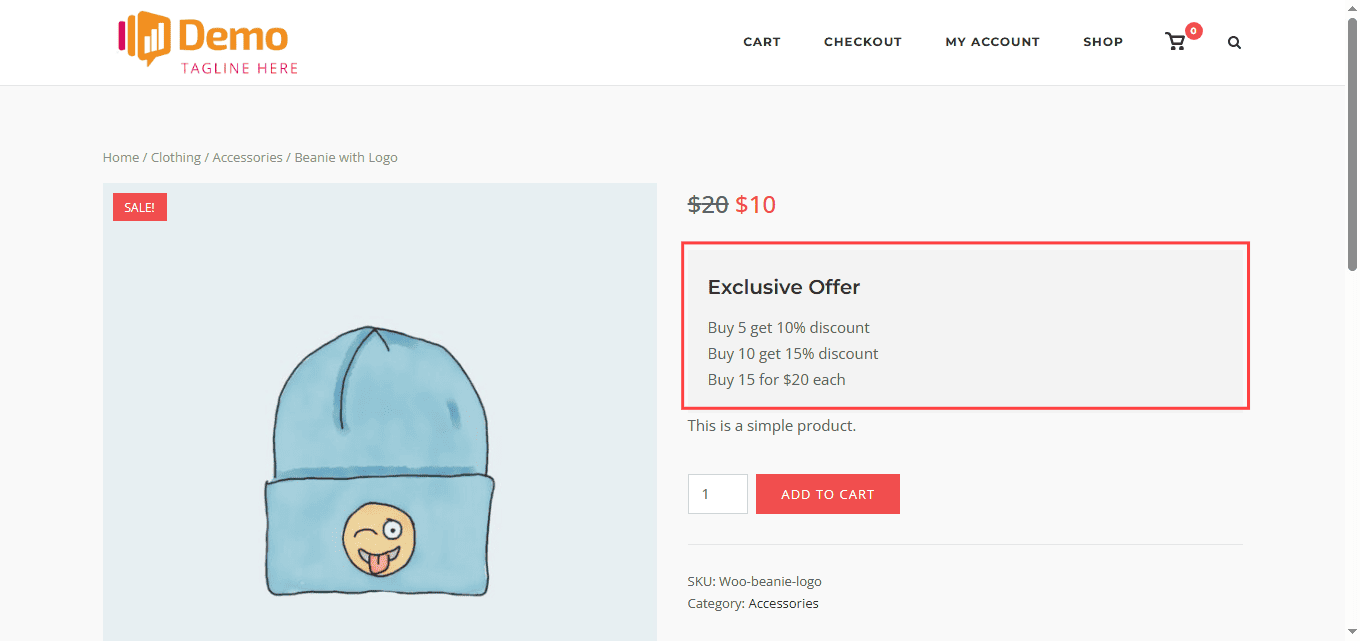
On the edit page you, will see Tier pricing section. If it is simple product, you will see the Tier pricing section right after the sale price. If it is variable product then you need to go to variations and then edit any variation you will see the Tier Pricing section just after the description. You will see a button +Add Tier Pricing/Customer Group Pricing. You just select the Customer group, add Qty for which the discount price is to be given and then select Price type and then of Price/discount.
You can add as many pricing as you want and then save these changes. Now if someone goes to fronted and is logged in as customer and his account is associated with selected Customer group which is set in the admin, then Tier Pricing section will display on the product page. If user add to cart the particular qty which is set in the admin then user will see Tier Pricing in action on the cart page without discount price which was set in the admin.
Enabling call for price on product : (Premium only)
To add Call for Price, first go to WooCommerce > Products. Now edit or quick edit the product, which you want to add Call for Price button. You will see a section where you will be able to select Customer Group. You can select one or multiple customer groups. Check screensot below.
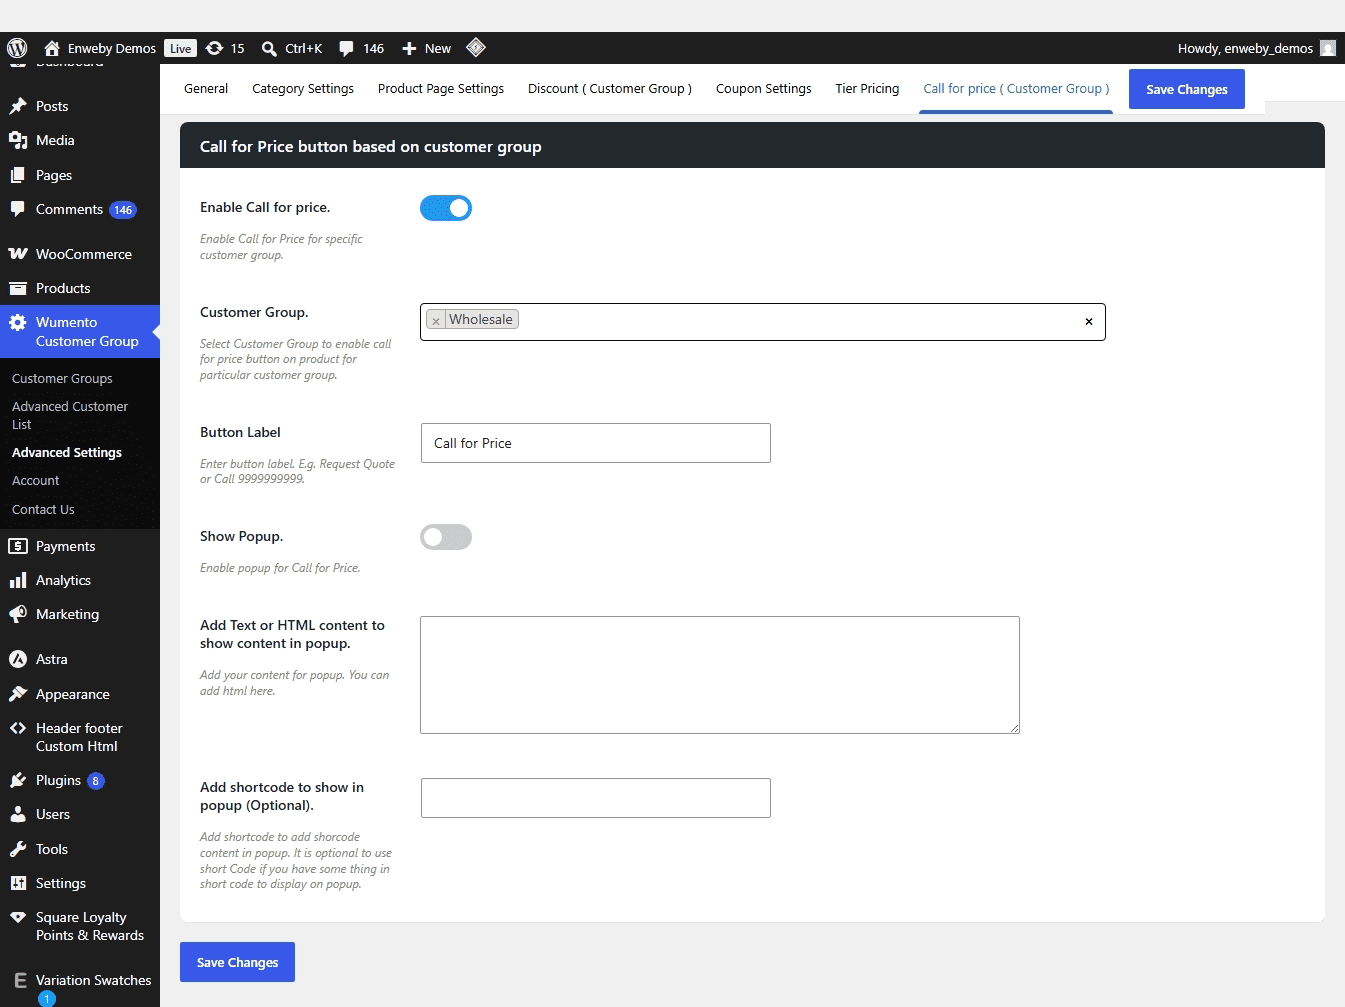
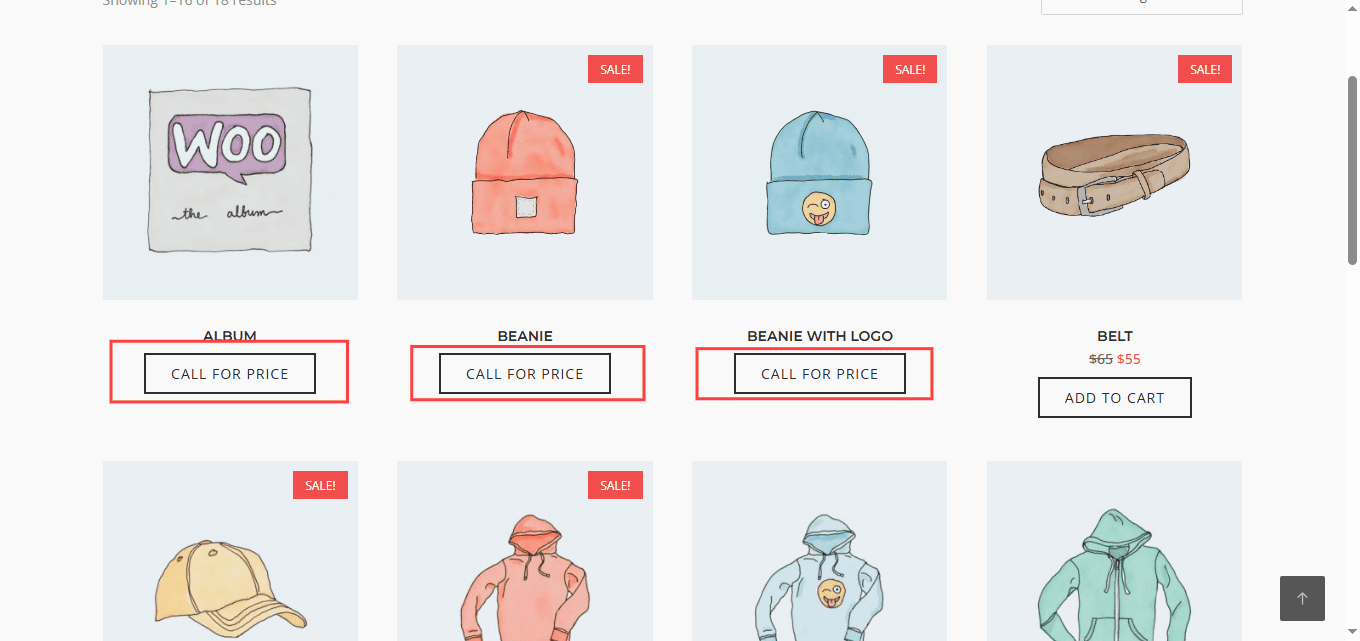
Now you need to setup Call for Price in the Wumento Customer Groups plugin. For this go to Wumento Customer Groups > Advanced Settings > Call for Price ( Group based ). Enable the call for price and select particular customer group or same customer group which you want to enable the Call for Price button. You can change the button label if you want and save it. Now if you check the frontend, the products will have Call for Price button instead of Add to Cart button
Call for price popup : (Premium only)
To enable Call for Price popup, you need to go Wumento Customer Groups > Advanced Settings > Call for Price ( Group based ).
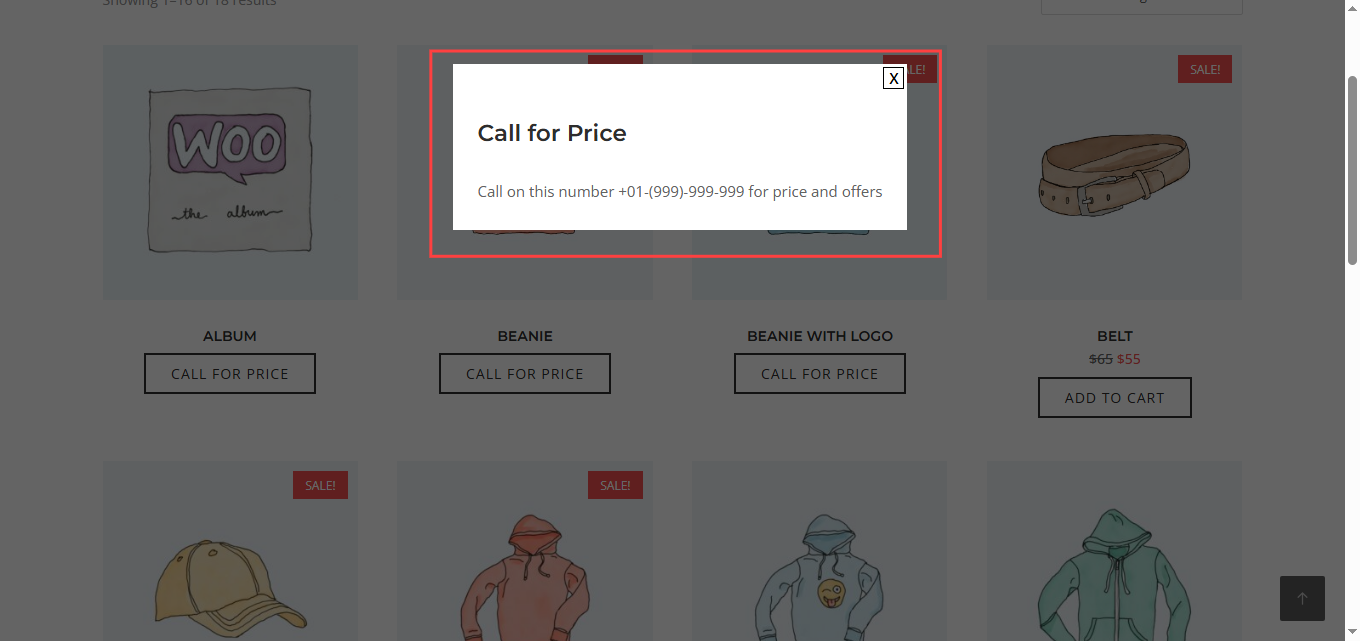
Enable Show Popup and add Text or HTML content to show content in popup. You can also add shortcode which is optional if you want to add for example you can add contact form. You can add both Html and Shortcode and both will display in the popup. Now save the changes. User will see the popup on the front and for the product the Call for Price if user is logged in and having same customer group which you have set in the the customer group in the Call for Price setting tab.